When you create many workflow applications, you’ll learn, that most of them will use same data again like organization information, responsible persons etc. So I started setting up a “Central Data” location with all relevant info as SharPoint lists. Then I went to the different applications and created a “Get Centralized Data” Flow for each of them. BUT… trying to update a SharePoint People field, that has the setting “multiple selections allowed” turned out to be a pain. You can’t just use the dynamic value from the central list, even the fields were configured identically.
Solution:
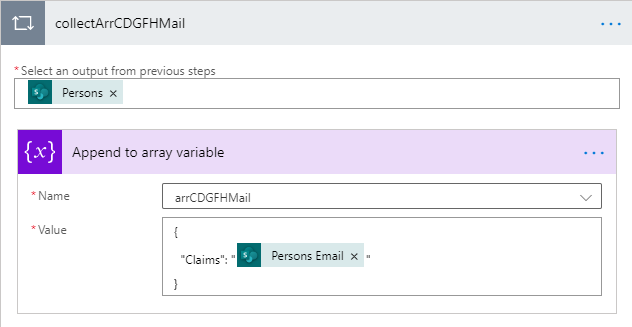
Put the person’s claims into an array variable, but don’t use “claims” but “Email” value (yes, it’s confusing ;-))
I created a Flow with trigger “SharePoint – When an item is created or modified” and went into an indefinite loop, because the system user modified the item and triggered the workflow again and so on. So I had to add a trigger condition, to not start if the “modified by” user is my system account.
Solution:
It was a bit tricky to learn, that I can’t use “Modified by Email” – I had to use the editors vaule instead. Here we go…
I had to build some app with confidential contents for different user groups. Some contents may only be visible to a specific group of people.
Solution:
First of all I created two different security groups in O365. Then I got the groupId through PowerShell (you could also use AzureAD) Connect-MsolService Get-MsolGroup | ? displayname -like “DisplayName”
Use the “OnStart” property of the app to load your group memberships into collections: ClearCollect(myUsers,Office365Groups.ListGroupMembers(“groupId”).value)
Now put the visible property of the element to hide to following: If(User().Email in myUsers.mail,true,false)
That’s it. It’ll check, if the current logged on user is in the collection of the group members and based on that displays content or not.
Out of the box PowerApps offers only a small palette of colors you can choose from. But since most companies have some design guidelines, specific colors may be required. There is already a uservoice available for that topic: Link to user voice
For the time being here is a workaround. 1. Save the .msapp file to your computer (File – Save as) 2. add the ending .zip to the download file 3. open the package (do NOT extract) with e.g. WinRar 4. edit the file Publishinfo.json (in folder Resources) and change the color code
5. save a copy of the file to your local drive 6. now DRAG&DROP the modified file into the package (do not extract and re-pack, it will not work) 7. remove the .zip ending from the package 8. in PowerApps EDIT the app you want to change 9. go to File – Open and upload the modified .msapp package 10. go to File – Save and click on “Raplace existing app here” 11. Publish the app
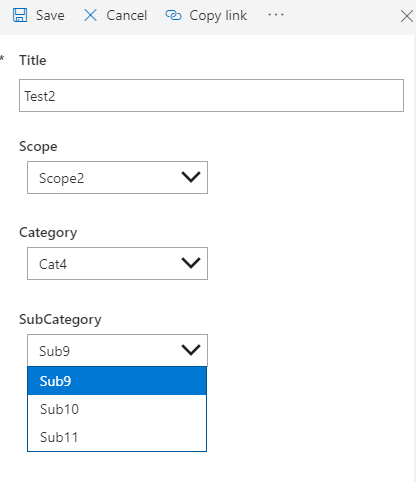
I had the requirement to have a list input form in SharePoint online, that contains “Scope”, “Category” and a “Subcategory”. Of course – to have it end user friendly – these dropdowns had to be cascading.
First of all: as of today, cascading dropdowns in PowerApps only works smooth with TEXT only values!! (yes, it’s a real mess) So how to prevent the user from typing mistakes with text only fields? –> Provide the user a lookup input interface and create the text only values with a simple Flow.
Solution:
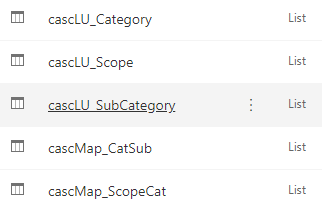
First of all create the lists – 3 simple lists with Title only for the lookup values and 2 lists for mapping
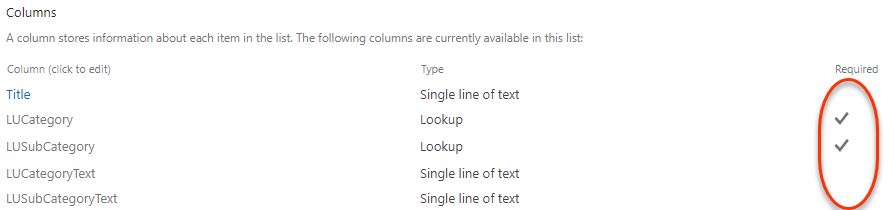
In the mapping lists make the Title not required, add 2 lookup columns that are required and 2 additional columns for the text value
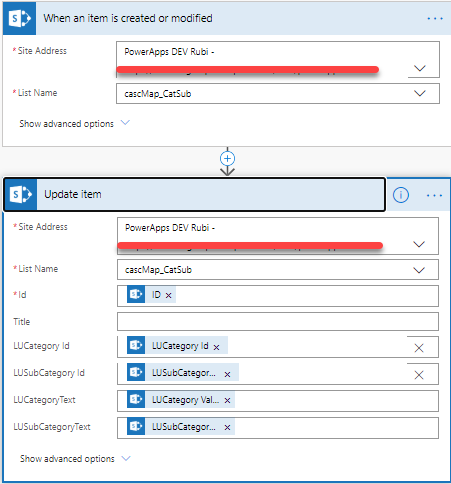
Create a simple Flow for each of the two mapping lists, that updates the text columns, that we’ll use later for our dropdown values
Then create a target list (also text only fields for these three “dropdown” columns!) Of course all other columns can be treated as standard.
In the main list click on “Customize Form” under PowerApps menu
Unlock the 3 Data Cards under “Advanced”, replace the text input controls with dropdown controls and rename them to something meaningful like “ddScope”, “ddCategory” and “ddSubCategory”
set the “UPDATE” property of the data cards to the name of the SP field to be updated with the value
Now modify the “Items” property of the new dropdown fields.
(if you want to sort the values, you can put a SortByColumns() function around the filter formula)
Now the lookups are already working, but if you click on Save, the values are not written to SharePoint. To fix this, we have to re-add the original columns to the form. When added again, unlock them under Advanced and set the “Default” property to the value of the dropdowns.


 (3 votes, average: 4.33 out of 5)