Patch PowerApps Attachment to SharePoint Library

Problem:

You can’t easily patch a file (any filetype) directly to a SharePoint Library (it’s different than working with a SharePoint list!). For this it takes several steps as a workaround.

Solution:

As a very first step create a new PowerApp and connect it with your library.
Secondly connect ANY SharePoint list to the app where attachments are enabled and embed an edit form for both lists.

In the form of the library add a custom data card and copy the attachment field from the list form to the empty custom data card – you can remove the error for “Parent.Default” by just deleting it. Afterwards you can also remove the data connection to the list and the related form since we just needed it temporary to copy over the attachment control. It should look simply like this:
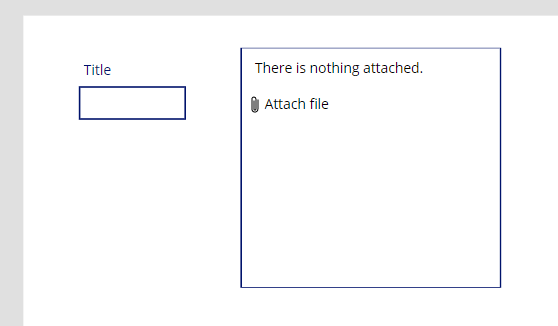
Not the trick begins…
If you upload an attachment and check it’s value, you’ll just see a URI for a temporary blob storage like in my example: appres://blobmanager/36446683a549421988f5b9f4b3bbdbb2/1

This format can not be used for further processing!
This is why we require a temporary image control.
Set the Image property of this control to:
Last(fileUpload.Attachments).Value
(where fileUpload is the name of my attachment control)

Now we need convert the output of the Image to a format we’ll be able to use later in a Power Automate Flow to create the file in the SharePoint library. For better understanding I’ll split the steps to not complicate the formula.

In the OnAddFile property of the attachment add following formulas:
(if you place any label and set it’s Text property to the variable, you can see what happens)
Set(varFileContent,JSON(imgTEMP.Image,JSONFormat.IncludeBinaryData));
Set(varFileStreamBase64,Mid(varFileContent,Find(“,”,varFileContent)+1));
Set(varFileStreamBase64Final,Substitute(varFileStreamBase64,””””,””));

Explanation:
In the first line we extract the Base64 encoded file content.
Next we remove the beginning of the file until “…Base64,” – this is where the real file content starts.
Last but not least we’re removing the character ” from the end of the file content string.

Now we need a Flow – just create a new Flow out of your PowerApp like this:
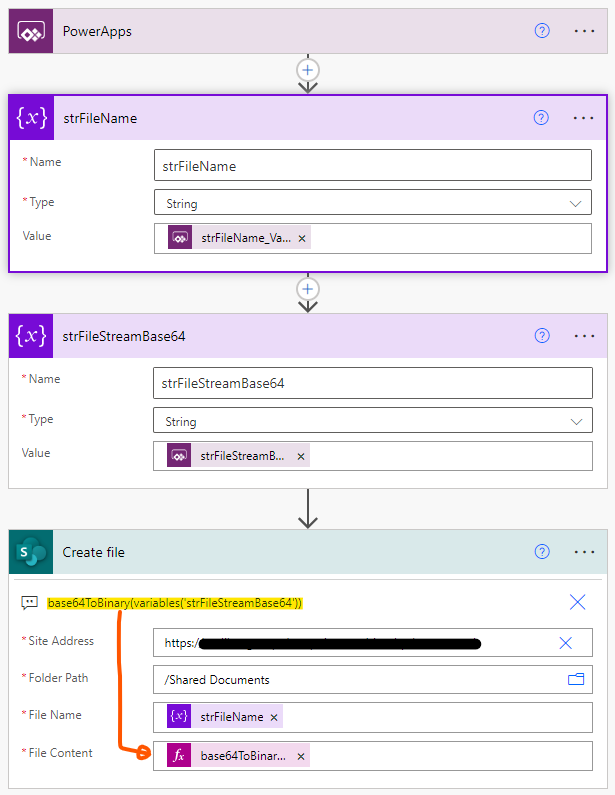
Now we just need to add a button to test.
OnSelect: ‘
PowerApps-UploadFileToSharePointLIBRARY’.Run(Last(fileUpload.Attachments).Name, varFileStreamBase64Final)
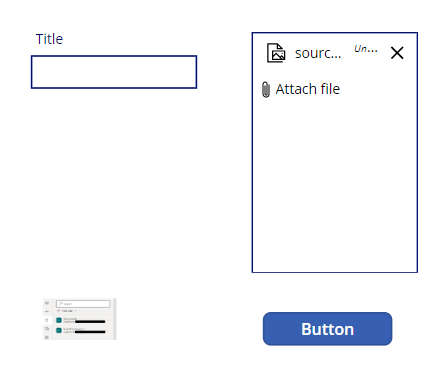
That’s it – I hope you enjoy and buy me a beer 😉

1 Star2 Stars3 Stars4 Stars5 Stars (No Ratings Yet)
Loading...

Make Power Apps SharePoint Dropdown (Lookup Field) searchable for “contains”

Problem:

If you use SharePoint as data source in Power Apps and you have dropdown fields for lookup fields, they’re only searchable as “begins with” but not for “contains”.
This is caused by SharePoint, if you use the default Items value Choices().

Solution:

You can get around this problem by building a collection.
The only trick, that also the update to SharePoint works, is that the collection may only consist of the columns “Id” and “Value”. You can achive this with the following formula:

ClearCollect(colMyCollection ,
ShowColumns(
RenameColumns(ListWithLookupValues,”ID”,”Id”,”Title”,”Value”)
,”Id”,”Value”
)
);

Now use the collection in the dropdown Items property.
That’s it…

1 Star2 Stars3 Stars4 Stars5 Stars (No Ratings Yet)
Loading...

Update SharePoint Lookup Field (multiple values allowed) from standalone Power App

Problem:

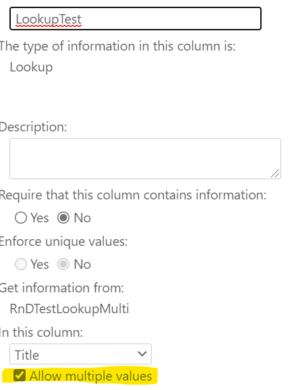
It may turn tricky to update SharePoint items from a standalone Power App, if you’ve configured a SP lookup column to allow multiple values.

Solution:

All you need to get around that issue, is to add another ComboBox to the datacard in the Power App form.
Then also create a data connection to the list, where the lookup values reside.

Settings for the ComboBox:

DefaultSelectedItems: If(Not(IsBlankOrError(Parent.Default)),Parent.Default)

OnChange: ClearCollect(myCol,ForAll(ComboBox1.SelectedItems,{Id: ThisRecord.ID,Value:ThisRecord.Title}));Reset(DataCardValue3)

OnSelect: Clear(myCol)

Settings for the origin lookup dropdown:

Change the setting for “multiple selections allowed” to “true”

DefaultSelectedItems: If(Not(IsBlank(Parent.Default)) && IsEmpty(myCol),Parent.Default,myCol)

(myCol = the collection created in the ComboBox OnChange property)

Explanation:

  • First we check, if there are already values available in the source item
  • the OnChange makes sure, that whenever we select new items, the collection myCol will be updated accordingly
  • the Reset() makes sure, that the values in the origin dropdown will also be updated
  • the Clear() function resets the collection, when the user starts a new selection
  • the origin dropdown will always have the selected items from the ComboBox
  • last but not least, hide the origin dropdown and that’s it

One more important thing to mention!
Keep the “Update” property of the datacard as “DataCardValuexx.SelectedItems” – if you try to pass in a table, the submit form function will fail. That’s the trick here.

Enjoy!

1 Star2 Stars3 Stars4 Stars5 Stars (No Ratings Yet)
Loading...

Copy & Paste from Excel into Canvas Power App

Problem:

Power App doesn’t provide functionality to just paste copied content from Excel into a table or a gallery. But it’s annoying people, if they have to type all the values from a calculated Excel file 1:1 into the Power App.
So I found a workaround, that people can just copy & paste values from a standardized table, with which values they need to start an approval workflow for many times.

Solution:

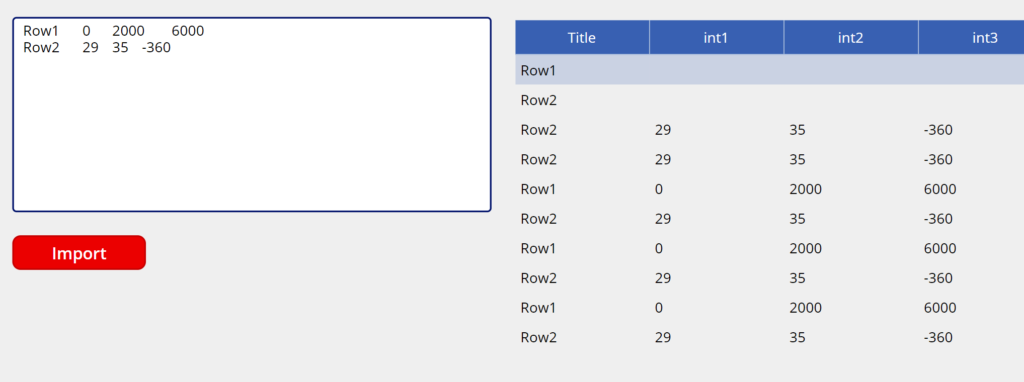
First we create a simple input form on Power App, containing a Text Input field, a table and a button. In my demo I use a SharePoint list as data source.

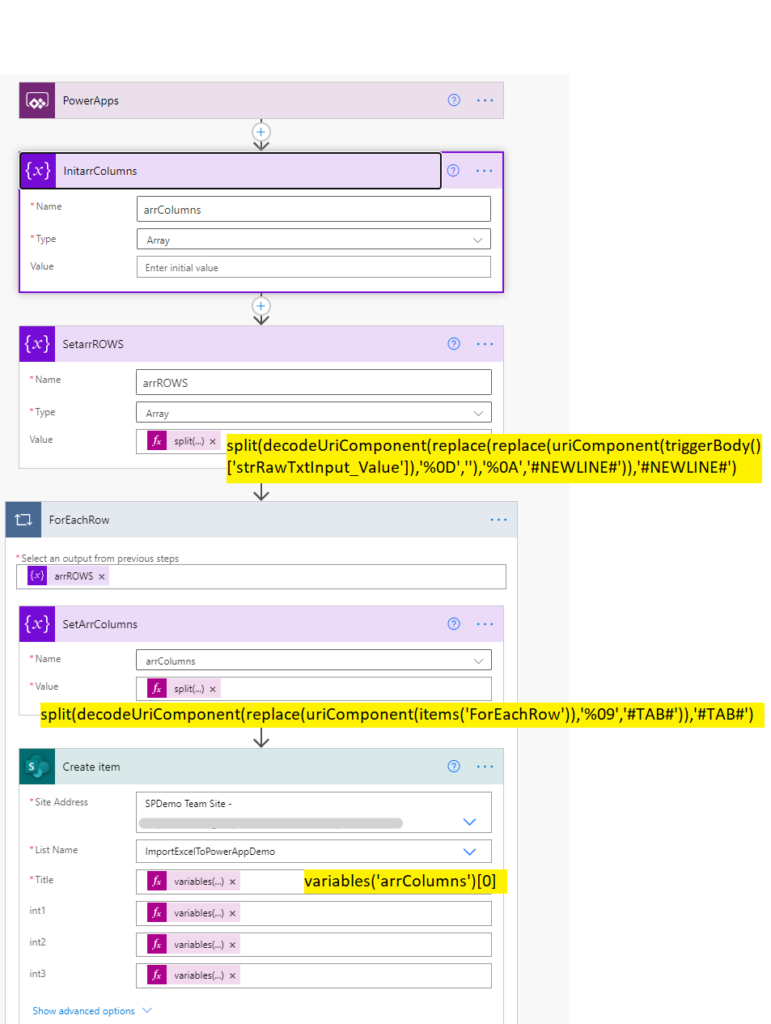
Then create a Flow with a Power App trigger.

Link the button to the Flow and pass in the text value.

Collection of formulas for you to copy:

Formula for the button:
YOURFLOWNAME’.Run(TextInput1.Text);Refresh(YOURDATASOURCE)

Expression to get the rows:
split(decodeUriComponent(replace(replace(uriComponent(variables(‘strRawTxtInput’)),’%09′,”),’%0A’,’#NEWLINE#’)),’#NEWLINE#’)

Expression to get the columns:
split(decodeUriComponent(replace(uriComponent(items(‘ForEachRow’)),’%09′,’#TAB#’)),’#TAB#’)

Have fun 😉


1 Star2 Stars3 Stars4 Stars5 Stars (2 votes, average: 3.50 out of 5)
Loading...

Change Favicon in SharePoint online (modern)

Have users asking to change the Favicon of SharePoint site collections?
Here we go…

You can download the app package from here: Download

  1. unpack the .zip file – you’ll get the sppkg file
  2. Either enable the site app catalog and upload the app or upload it to the tenant’s app catalog
  3. usually it asks you automatically to deploy; if not, select the sppkg file and click “deploy”
  4. Under site contents add an app and choose “Custom Favicon”
  5. In the Site Assets library place the icon file name “favicon.ico”
  6. STRG + F5 and it should already work (maybe wait for one minute)
1 Star2 Stars3 Stars4 Stars5 Stars (12 votes, average: 3.67 out of 5)
Loading...